Coq au Vin – A Tribute to Keith Floyd

My version
My version
Keith's version
Keith's version

(See also “Farewell Floyd Event – A Winning Recipe: Coq au Vin”)

After not being able to take part in the ‘Farewell Floyd Food Blogging Event’ last weekend due to feeling ill, I was so happy to read that the deadline for the competition had been extended to the 25th October, meaning I was able to take part after all!

The idea of the event is that we all cook a meal in tribute to this much-loved chef either by cooking up a classic Keith Floyd recipe, an adapted Keith Floyd recipe or a recipe of our own design inspired by, and in tribute to Keith Floyd.

Having been lucky enough to borrow my mum’s original copy of ‘Floyd on France’, I spent an evening trawling all the delicious recipes to find a true classic that I could attempt to cook for this event. I ended up deciding to cook his Coq au Vin recipe which is translated in his book as ‘Cockerel in Red Wine’.

So I set about getting all the ingredients including a decent bottle of red Burgundy as Floyd uses it specifically in his recipe and mentions that “Burgundy is supposed to be famous for Coq au Vin”.

As for my own take on this recipe, I decided to use free-range chicken from Somerset as well as local cider brandy.

Now for my gluten free twist, I used cornflour to make my Beurre Manié and gluten free bread for my Garlic Croutons. This meant that my whole family could enjoy this fantastic dish, as I cooked it in Somerset on a weekend visit home.

I hope everyone that had taken part in this event has had as much fun creating their dishes as I have with mine and I hope that others try this fantastic Coq au Vin recipe. I also hope the late, great Keith Floyd would appreciate my twist of his recipe, as he was born and raised in Somerset too!

(Printable Recipe)

Serves 4 to 6

Ingredients:
4lb (2kg) Free-range chicken joints (from Somerset preferably)
5ozs (150g) Green streaky bacon, cut in cubes
20 Small Onions
4ozs (125g) Butter
1/2 Glass Brandy (Somerset Cider Brandy)
2 pints (1ltr) Red Burgundy
1 Bouquet Garni (made with fresh Thyme, Parsley and Bay Leaves)
2 Cloves Garlic
Salt and Pepper
1tbsp Sugar
7ozs (200g) Button Mushrooms
1tbsp Cornflour
Garlic Croutons (Gluten Free)

1 Fry the chicken, bacon and onions in about 2.5ozs (65g) of butter in a large pan.

2 When they have started to brown, chuck in the brandy and flame.

3 Pour on the red wine and add in your bouquet garni, garlic, salt and pepper.

4 Bring to the boil, add the sugar, cover and simmer for approximately 2 to 3 hours or until the chicken is cooked.

5 At the end of the cooking time, heat the mushrooms in some butter.

6 Remove the chicken from the pan when it is done, putting it into a deep platter to keep warm.

7 Discard the garlic and bouquet garni, then add the mushrooms to the sauce and simmer for 5 minutes.

8 Make a Beurre Manié with the remaining butter and cornflour and add it to the sauce little by little.

9 Stir it well until the sauce had thickened.

10 Arrange the chicken pieces in the platter and pour the sauce over, garnishing with the garlic croutons.

Serve with potatoes of your choice, or crusty bread, green vegetables and/or a green salad.

Enjoy!

Competition Links:
Back to the Chopping Board: Farewell Floyd: Food Blogging Event

A Slice of Cherry Pie: Farewell Floyd: Food Blogging Event

IMG_4180

IMG_4185

IMG_4188

IMG_4195

IMG_4197

IMG_4202

IMG_4218

IMG_4220

IMG_4231

IMG_4232

Garlic Croutons (Gluten Free)

IMG_4221

I had to learn how to make these gluten free garlic croutons for my entry to the Farewell Floyd Food Blogging Event but you can use ordinary bread too.

(Printable Recipe)

Ingredients:
1oz (25g) Butter
1 Garlic Clove crushed
1 Slice of Bread (any kind) cut into cubes

1 Melt the butter in a pan and add the crushed garlic clove on a very low heat, allowing time for the garlic to infuse the butter.

2 Remove the garlic clove, turn up the heat and add the bread cubes and cooke until lightly golden and crisp.

3 Drain on some kitchen paper.

Enjoy!

Beurre Manié

IMG_4213

I had to learn how to make this thickener for my entry to the Farewell Floyd Food Blogging Event. It is usually made with ordinary flour and butter rather than the cornflour that I am using for my gluten free recipe. It can also be used to thicken hot soups, sauces and gravies.

Adjust the following amounts to suit your own needs.

(Printable Recipe)

Ingredients:
1oz (25g) Butter
3/4oz (20g) Cornflour

1 Blend the cornflour and butter together in a small dish.

2 Add the Beurre Manié in very small lumps to the sauce that you wish to thicken, a few at a time.

3 A good way to stop the sauce going lumpy is to add a few lumps on the tip of a knife, scraped down the side of the pan. This melts slowly, ensuring no lumps.

4 Stir into the hot liquid until completely blended.

5 Return pan to the heat and slowly bring to the boil, stiring all the time until the sauce is thickened.

This is suitable for 1 pint of liquid.

Enjoy!

IMG_4214

Green & Red Tomato Chutney

DSCF1615

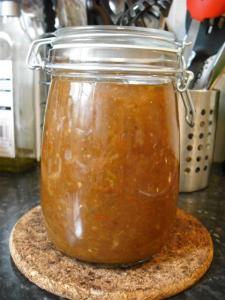
It’s halfway through October and with a lack of sunshine I still had approx. 30 green tomatoes on my plant outside. Now with the first frosts at the tail end of the year about to happen, I didnt want them to go to waste so decided to have a go at another chutney after making my Spicy Green Tomato Chutney last month.

I found another great recipe that looked delicious as well perfect for my needs, as I wanted something less spicy this time.

I only had 8ozs of green tomatoes from my plant, so added 8ozs of red tomatoes to make up the pound in weight.

As with my last chutney, this didnt require any finesse to make, but was great fun and the smells around the kitchen were amazing. While it was cooling, we were already tucking into it with some cheese as it looked so good. The best bit is that it tastes as good as it looks.

This is definately one recipe I will be making again if I am left with a glut of green tomatoes next year!

(Printable Recipe)

Ingredients:
1 lb Tomatoes - green, red - or a mix of either
1 lb Cooking Apples - peeled and cored
1 lb Demerara Sugar
1/2 lb Onions - peeled
1/2 lb Sultanas
1 pt Malt Vinegar
1 level tbsp Salt
2 tbsp Flour
1/2 tbsp Ground Ginger
1 tsp Mustard Powder

1 Roughly dice and chop the tomatoes, apples and onions and put them all in a good heavy based pan, mixing it well.

2 Add 3/4 pint of vinegar, the sultanas and the salt, bring to the boil and simmer until it turns into a pulp, stirring frequently – Approx 20-30 mins.

3 Add the demerara sugar, stirring in to dissolve, then bring it all gently back to the boil and then continue simmering gently for a few minutes.

4 Then mix the flour, mustard and ground ginger with the rest of the vinegar together in a small bowl.

5 Add in the above mixture, stirring it well to stop it from sticking to the pan.

6 Bring it all gently to the boil again, and stir until it starts to thicken (for about 5-10 mins).

7 Spoon into sterilised jars and enjoy either after standing for a while to let the flavours develop or immediately if you are impatient like me.

Enjoy with anything savoury!

DSCF1612

Green Tomato on Foodista

Tomato on Foodista

Pears in Cider

IMG_4107

This reciipe is Gluten Free.

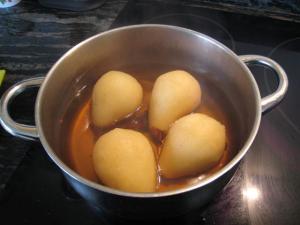
After the delicious Pears with Macaroon Crumble Topping last week, my mum left us waiting for her next pudding she was going to make with pears. Well here it is and this is what she said to me…

I told you it was worth the wait!

Serves 4-6 people

1 pint (568ml) of Medium/Sweet Cider
4-6 Ripe Pears (but still firm)
½ Cinnamon stick
2 or 3 pieces of Lemon rind
5ozs Caster sugar – unrefined
1 level teaspoon of Arrowroot - optional

1 Place the cider, sugar, lemon rind and cinnamon in a saucepan and bring slowly to the boil to allow the sugar to dissolve.

2 Turn it down to a simmer and add the pears, poach for 20/30mins until pears are soft but still whole and firm. The pears need to be frequently turned in the cider to cook them.

3 When the pears are cooked (check with a knife) take out of the liquid set them aside and keep them warm.

4 Bring the poaching liquid back to the boil and cook until the liquid is syrupy. A little arrowroot can be added if required.

5 Pour a little of the syrup over the pears to glaze them.

6 To serve place them in individual glass dishes, or a large dish, spoon over some of the syrup and serve hot, warm or chilled with fresh cream or vanilla ice-cream.

Ice-cream is particularly good if the pears are hot and a chocolate sauce is also good poured over the pears.

IMG_4102

IMG_4103

IMG_4104

IMG_4106

Pear on Foodista

Blackberry Vanilla Cupcakes

DSCF1602

Having already made lots of delicious things with all the blackberries I had foraged a few weeks before, I wanted to make something completely different and outside of my ‘comfort zone’, so I started searching for food blogs using blackberries in other ways.

I then stumbled across Donal Skehans excellent blog The Good Mood Food Blog and some of the delicious things he was making with blackerries over in Ireland.

I first noticed his Blackberry Coulis recipe which is very similar to my own Blackberry Compote one and then saw the superb cupcakes he had made using his coulis. Having never made any cakes in my adult life, this was the challenge I wanted and so I set about getting the few ingredients I didnt have in my cupboard or fridge, before having a go at making them and doing his recipe proud! As Donal quotes, ‘This recipe makes delicious, light and moist cupcakes with a fruity taste’.

What I discovered, like so many other recipes I try, it wasnt overly complicated to do, you just needed to follow the instructions step by step.

So I started by making his Blackberry Coulis, so that it was then ready for me to use in the cupcake mixture later on. Once I had sieved it and let it cool, I started on my baking adventure, thinking I was going to get flour and eggs everywhere and dreading the washing up after. Suprisingly, for the time I spent in the kitchen, I only used 3 bowls and a saucepan and hardly made a mess at all!

Again, not having any ink in my printer (I must remember to buy some) I brought my laptop into the kitchen so I could follow Donal’s recipe. It was a total clash of technology and cuisine going on in my small kitchen, epecially when I got my LED beeping electronic scales out too!

I got everything ready to bake, with my girlfriend on hand in the living room watching ‘Come Dine With Me’ (being the normal master home baker), just incase I messed anything up.

All I can say is that they were great fun to make! Everything was so easy, and after spending all that time in the kitchen making them, all I wanted to do was eat one.

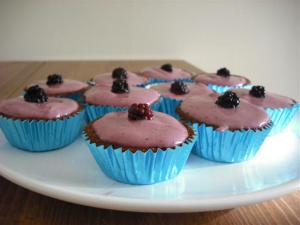
I made sure the cakes properly cooled before spooning on the frosting, and then put them aside to set. Once I was happy that they were ready to eat, I had my first one and it was totally delicious! My girlfriend was very impressed at my baking, so I continued into the evening, using the rest of the cake mixture to make a dozen more, so that I could freeze some and have them on other occasions, especially as I have some of the coulis left too.

If anyone wants to have a go and making some fruity cupcakes, then I suggest you have a go at these as the are fantastic!


Blackberry Coulis

Makes about 150ml/¼ pint

250g Blackberries
50g Golden caster sugar
½ tsp Vanilla extract

1 Put the blackberries and sugar into a small pan with 100ml/31⁄2fl oz water. Bring to the boil, then simmer for 5 mins until the fruit is soft. Stir in the vanilla, remove and cool a little.

2 Tip the contents of the pan into a blender or food processor, and whizz to a purée, then strain through a sieve, rubbing it through with the back of a ladle or spoon.

Serve warm or chilled.

DSCF1575

DSCF1580

The coulis will keep in an airtight container in the fridge for up to 3 days, or freeze for up to 3 months.


For the main recipe:

DSCF1603

Blackberry Vanilla Cupcakes

(Recipe adapted from Donal Skehan)

Makes 24 cupcakes

For the cupcakes:
1 cup Flour
2 tsp Baking powder
1 tsp Salt
6 tbsp Unsalted butter, at room temperature
1 cup Sugar
2 Eggs
1 tsp Vanilla extract
1/2 cup Milk
1/2 cup Blackberry coulis (made earlier)

For the frosting:
8 oz Cream cheese, at room temperature
3 cups Powdered sugar, sifted
2 tbsp Blackberry coulis
Blackberries for decoration

Preheat the oven to 180C.

1 Line a cupcake pan with paper liners.

2 In a small mixing bowl, stir together the flour, baking powder and salt. Set aside.

3 In the bowl of an electric mixer, cream together the butter and sugars on medium-high speed until light and fluffy. Add in the eggs one at a time, scraping down the bowl between additions.

4 In another bowl or liquid measuring cup, whisk together the milk and blackberry coulis. Add half of the dry ingredients to the bowl of the mixer and mix on low speed until just combined. Mix in the blackberry coulis/milk mixture. Mix in the remaining dry ingredients on low speed just until incorporated. Do not over-mix.

5 Divide the batter evenly between the prepared paper liners.

6 Bake for 12-15 minutes or until a toothpick inserted in the center comes out clean. Allow to cool in the pan 10-15 minutes. Transfer to a wire rack and allow to cool completely.

To make the frosting, combine the cream cheese, powdered sugar and blackberry coulis in the bowl of a stand mixer fitted with the paddle attachment. Mix on medium speed until smooth and well blended. Frost cooled cupcakes as desired and garnish with fresh blackberries.

DSCF1584

DSCF1586

DSCF1607

DSCF1608

Blackberry on Foodista

Roasted Butternut Squash Soup (Gluten Free)

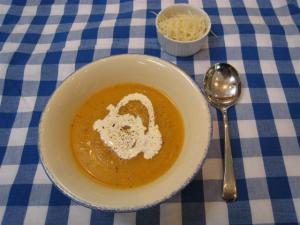
IMG_4094

Soup season is now well and truly upon us and it seems my whole family is making fantastic soups to share with everyone. This roasted butternut squash soup is a new creation by my mum and one that we will be trying shortly!

I had a butternut squash and thought I’d make some soup. I searched on-line for a recipe, looked at James Martin’s recipes on the BBC site, but they all seemed too complicated. So I made this up as I tend to make all my soup recipes up. Usually I just guess at the weights of ingredients, and also the amount of stock I use, but I have weighed everything this time just to make sure it works for this blog. It is a good soup for Hallow’een or Bonfire Night. I like it I hope you do too.

2¼lbs (1kg) Butternut Squash
2 tablespoons Olive oil
Salt and freshly ground pepper
1oz (25g) Butter
1 Medium onion
1-2 Cloves of garlic – depending on your taste
1½ pints (1ltr) Vegetable stock
A few sprigs of thyme leaves – to taste
Cream or Crème Fraiche
Grated cheese or pesto – optional

Preheat the oven to 200C/400F Gas 6 or 180C Fan Oven

1 Cut the Butternut Squash into chunks, removing all the seeds, rub with the oil, season well and roast in the oven, skin-side down on the tin, for approx 30mins or until tender.

2 Leave to cool and then slice off the skin and cut the flesh into smaller chunks.

3 In the meantime, melt the butter in a saucepan, chop the onion and cook gently in the butter until soft but not browned, then add the chopped garlic clove and cook for a further 2mins.

4 Add the chopped squash and any juices from the tin, the stock and some of the thyme leaves – check for your liking. Sprigs can be added but make sure they are removed before blending.

5 Cover and simmer for 20/30mins

6 Leave the soup to cool slightly and then, either using a hand-blender or liquidiser, blend until smooth and taste for seasoning.

7 Ladle into warmed bowls and swirl the top with a little cream or crème fraiche, a scattering of thyme leaves, before serving with warm crusty bread.

If the soup is too thick for your liking add some milk to loosen it. Grated cheese is also good scattered on top as is a dollop of green pesto. This soup can also be frozen.

IMG_4091

IMG_4092

IMG_4093

IMG_4095

Butternut Squash on Foodista

Venison Steaks with Redcurrant Sauce

I really wanted to have something a bit special and different for supper one night this week, so ended up driving out to Sunnyfields Organic Farm to see what they had on offer and to have a look at all their local produce as well – all I can say is wow – the food looked so good that I could have spent a small fortune!

As soon as I saw the Organic Venison Steaks, I had to bring them home along with an assortment of organic vegetables.

Having never cooked Vension Steaks before, I then set about asking people for ideas and trawling recipe sites for ideas. Someone suggested to me a Redcurrent and Red Wine Sauce, so I set about to find a tasty one online. On the Good Food Channel website I found this recipe by Mary Cadogan and it sounded fairly easy to make and delicious too!

Luckily I had all the ingredients in the fridge or cupboards, so didn’t need to pop out again for anything else. Cooking the meat and the sauce was as easy as the recipe suggested and the proof was in the eating – it tasted fantastic. I served it all up with an assortment of the vegetables, roasting the sweet pototoes in the oven – I even ended up making my carrots looking fancy too!

My girlfriend had never eaten Vension before and was unsure whether she was going to like it or not, until she had her first mouthful and her reaction was “Wow”! She thought it was so soft and tasty and perfectly pink in the middle. We both thought it was richer and tastier than normal steak and it was the something ‘special and different’ that I had been looking for. While it is still in season, we will be going back next week for some more steaks to have again!

This is one recipe I highly recommend to anyone who loves, or wants to try, Venison.

300ml Beef consommé
150ml Red wine
350g Venison steaks, (2-4 depending on size)
Salt, and freshly ground black pepper
2 sprigs Thyme
1-2 tbsp Olive oil
2 Shallots, finely chopped
1 tbsp Redcurrant jelly
Knob of Butter
Flat leaf Parsley, to garnish

1 Boil the consommé and red wine until reduced by half. This will take about 10 minutes.

2 Season the venison with salt and pepper and scatter over thyme leaves.

3 Heat 1 tablespoon of olive oil in a frying pan; add the venison and fry quickly on both sides until browned. Remove to a plate.

4 Add the knob of butter to the pan and then add the shallots and fry gently until softened.

5 Add the reduced stock and red wine and redcurrant jelly and stir to dissolve the jelly.

6 Return the venison to the pan and cook for 3-4 minutes, turning until it is cooked to your liking. Taste and adjust seasoning if necessary.

Garnish each portion with a small sprig of flat-leafed parsley.

Serve with seasonal vegetables or vegetables of your choice.

DSCF1554

DSCF1560

DSCF1561

DSCF1562

DSCF1564

DSCF1558

DSCF1572

DSCF1570

Pears with Macaroon Crumble Topping (Gluten Free)

IMG_4078

As you can tell from my recent recipes/posts, Autumn is well and truly upon us now and to many it is their favourite culinary season of the year. I myself, am starting to appreciate what is on offer properly during Autumn for the first time, now that I actually get to write about it.

Watching the likes of Nigel Slater and Valentine Warner on tv, you can really discover what things are coming into season right now and how to make use of them – apples and pears being a few of the best known fruits for this time of year.

So it is appropriate that this delicious recipe is pear related and ideal for an autumnal day, especially after a sunday lunch. As ever, I asked my mum for the story behind this recipe and this is what she told me…

A friend gave me some freshly picked pears from his garden – after eating a few, I decided to make a couple of my favourite dishes, both are gluten free. Apart from ‘Tarte au Poire’ a classic French pudding, cooked pear recipes are not easy to find.

This one is a particlar favourite as it is a change from apple crumble and the addition of macarons gives it a slightly different flavour. I serve it warm with either home-made custard or cream.

The other recipe I shall be making for Sunday lunch as it is refreshing and not to heavy a pudding after a Sunday Roast. It is worth the wait!

2¼lbs (1kg) Ripe Pears
4ozs (125g) Caster Sugar – unrefined
Juice of 1 Lime
70zs (200g) Plain Flour or Gluten Free Plain Flour
4ozs (100g) Butter
12 Macaroons (check the ingredients)

Preheat oven to 180C/350F Gas 4 or 170C Fan Oven

1 Peel, core and cut the pears into large pieces and put into a saucepan with the lime juice and 1oz (25g) of sugar and cook for a few minutes until softened. Then spoon into a dish.

2 Sift the flour, cut the butter into small cubes, and either rub into the flour to make fine breadcrumbs or whizz in a food processor.

3 Add the remaining sugar and mix again.

4 Crumble the macaroons and stir in to the mixture.

5 Sprinkle the crumbs over the fruit without pressing down and bake in the oven for 20/30 minutes until golden brown.

Serve with cream or custard.

Apples can be substituted for pears.

IMG_4080

IMG_4081

IMG_4085

IMG_4086

IMG_4087

IMG_4088

IMG_4090

Pear on Foodista

Leek and Potato Soup (Gluten Free)

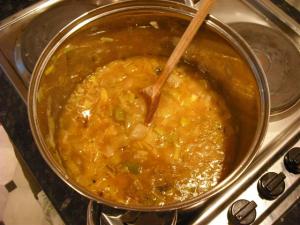
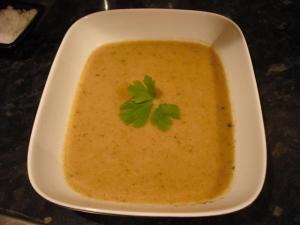
DSCF1517

You always know when Autumn arrives, as evenings get darker quicker, the temperature starts dropping and the idea of making a warming soup doesn’t sound like such a silly idea!

Leek and Potato Soup is a home favourite and perfect for any autumnal lunch or supper, plus it is so easy to make.

3-4 Leeks
6-8 Large Potatoes
1 Large Whte Onion
50g (1.8 oz) butter
1 1/2 pints of vegetable stock (gluten free preferably)
1/4 pint semi-skimmed milk
Salt and freshly ground black pepper to season

1 Peel and roughly chop all the vegetables into thick cubes. Add them all to a large dish or pan and add the butter, stirring the vegetables until they are all coated. Leave on a very low heat with a lid on the pan for 15 minutes to allow the vegetables to gently sweat. Stir occasionally.

2 Then, add the stock and the milk and stir. Leave to simmer with the lid on the pan for another 20 minutes, Do not let the soup reach boiling point or the milk might burn. Stir occasionally.

3 After the 20 minutes, the vegetables should be lovely and soft.

4 Use a liquidiser or a hand-held blender straight in the pan and liquidise the mixture. You need to make sure all the lumps are gone.

5 Gently heat the soup through in the pan and season with salt and pepper to taste.

Serve with pretty much anything you like!

DSCF1521

DSCF1523

DSCF1526

DSCF1527